-
TIL - React Table Library #1개발 2022. 5. 2. 23:25

Headless Utility
'헤드리스' 유틸리티란 실제 UI 요소를 렌더링하거나 제공하지 않고, 라이브러리에서 제공하는 Hook이나 Callback 함수를 활용하여
렌더링해야할 테이블의 마크업은 개발자 임의로 다룰수 있는 방식으로 구축된 UI 라이브버리를 일컷는다.
이러한 방식으로 구축된 이유는
1. 관심사를 분리하여 테이블 스타일링을 커스텀하기에 적합한 사용방식을 제공한다.
2. UI 렌더링에 대한 로직을 라이브러리에서 담당하지 않기 때문에 API의 양이 작고 사용하기 쉬우며, 업데이트/유지 관리가 간단하다.
3. 모든 개발자가 다르게 작업을 수행할 수 있는 라이브러리이기 때문에 수많은 엣지케이스에 대응이 가능하고, 개발자의 고유방식대로 UI를 설계하고 확장 할 수 있다.
기본 테이블 그리기
React Table은 useTable 훅을 사용하여 렌더링할 테이블 데이터를 가공 할 수 있다.
useTable에 들어가는 매개변수로 columns, data를 입력해주어야 하는데
const tableInstance = useTable({ columns, data })이때 매개변수로 들어가는 정보는 메모이제이션을 통해서 실제 데이터 변경이 있을때만 훅에서 가공된 결과가 달라 질 수 있도록 해야한다.
 const data = React.useMemo(
   () => [
     {
       col1: 'Hello',
       col2: 'World',
     },
     {
       col1: 'react-table',
       col2: 'rocks',
     },
     {
       col1: 'whatever',
       col2: 'you want',
     },
   ],
   []
 )
const columns = React.useMemo( () => [ { Header: 'Column 1', accessor: 'col1', // accessor is the "key" in the data }, { Header: 'Column 2', accessor: 'col2', }, ], [] )이렇게 만들어진 테이블 인스턴스의 정보를 살펴보면 마치 API로 내려받은 데이터처럼 예쁘게 가공되어 있는 모습을 확인 할 수 있다.
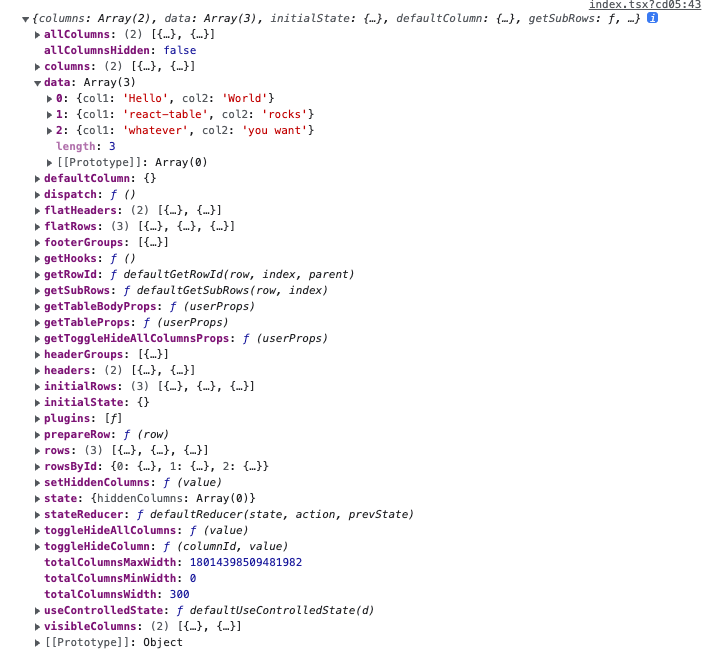
이 정보들을 통해서 실제 테이블의 UI를 그려주는것은 개발자의 마음대로 하면된다!
예시 코드대로 렌더링 해보면 아래와 같이 테이블을 그릴수가 있겠다.
더보기const tableInstance = useTable({ columns, data }) const { getTableProps, getTableBodyProps, headerGroups, rows, prepareRow, } = tableInstance return ( // apply the table props <table {...getTableProps()}> <thead> {// Loop over the header rows headerGroups.map(headerGroup => ( // Apply the header row props <tr {...headerGroup.getHeaderGroupProps()}> {// Loop over the headers in each row headerGroup.headers.map(column => ( // Apply the header cell props <th {...column.getHeaderProps()}> {// Render the header column.render('Header')} </th> ))} </tr> ))} </thead> {/* Apply the table body props */} <tbody {...getTableBodyProps()}> {// Loop over the table rows rows.map(row => { // Prepare the row for display prepareRow(row) return ( // Apply the row props <tr {...row.getRowProps()}> {// Loop over the rows cells row.cells.map(cell => { // Apply the cell props return ( <td {...cell.getCellProps()}> {// Render the cell contents cell.render('Cell')} </td> ) })} </tr> ) })} </tbody> </table> )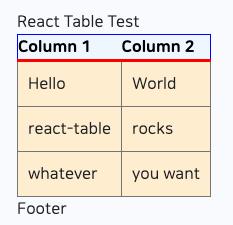
테이블 커스텀 하기 (feat. React Bootstrap)
프로젝트에 도입할 테이블의 레퍼런스 타입은 아래와 같이 여러 기능을 포함하고있다.
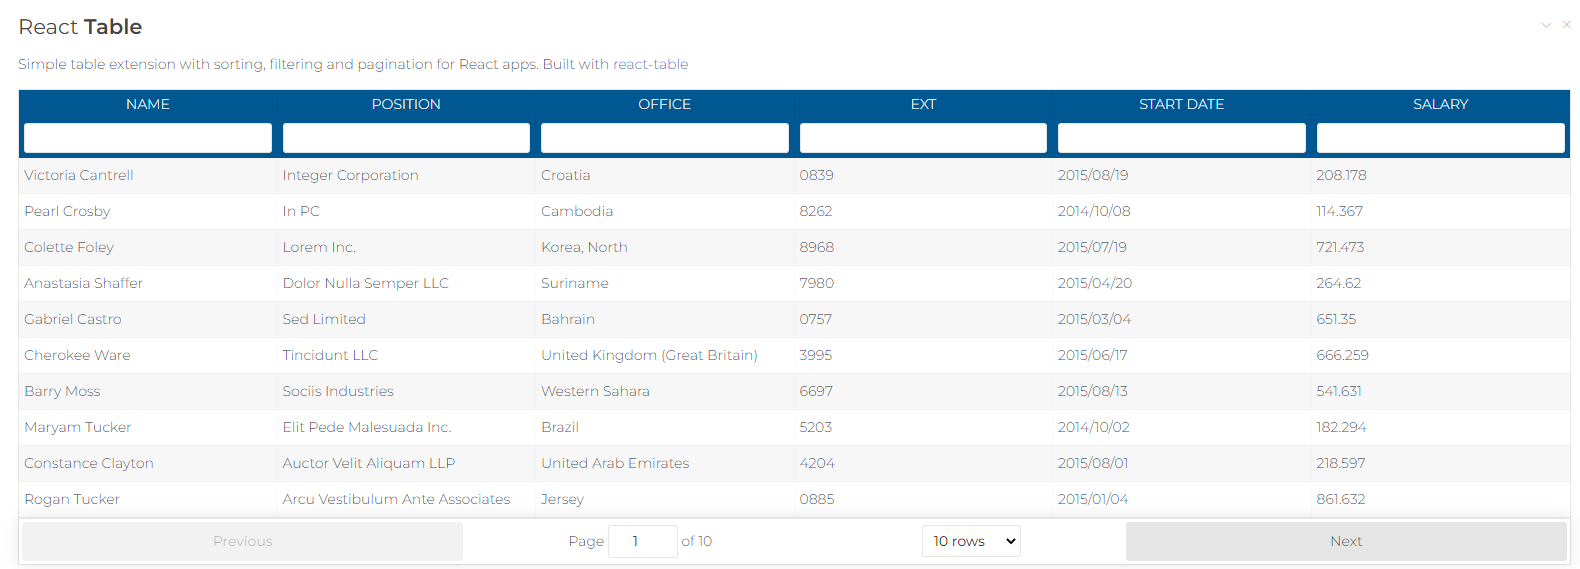
- 페이지네이션
- 컬럼별 sorting
- 체크박스 선택기능
- 검색 기능
기본 테이블에서는 별 다른 기능 없이 표의 형식만 갖고 있기 때문에 React Table에서 제공하는 Hook을 통해서 기능을 추가해 줘야한다.
페이지네이션
https://react-table.tanstack.com/docs/examples/pagination
Examples: Pagination
Subscribe to Bytes The best JavaScript newsletter! Delivered every Monday to over 76,000 devs.
react-table.tanstack.com
공식문서를 살펴보면 기능 예제 코드가 친절하게 나와있다.
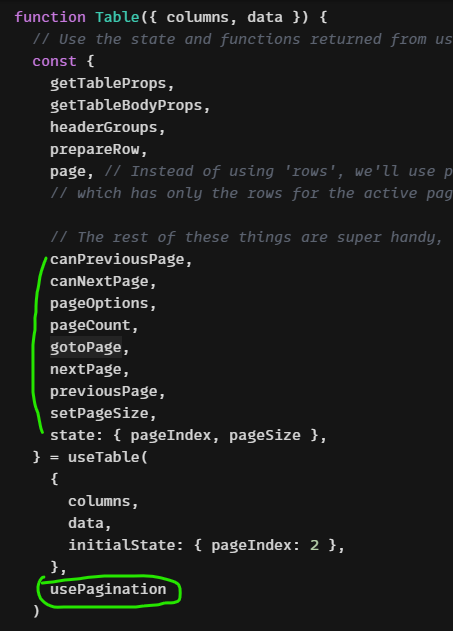
단순 표의 형식을 출력하기 위해서 { columns, data } 객체를 할당에서 끝나지 않고, usePagination이라는 훅을 매개변수로 할당하여 페이징을 위한 인터페이스를 제공받는다.
이렇게 제공된 인터페이스 또한 컴포넌트를 렌더링 할때의 기능으로 사용될 수 있는데
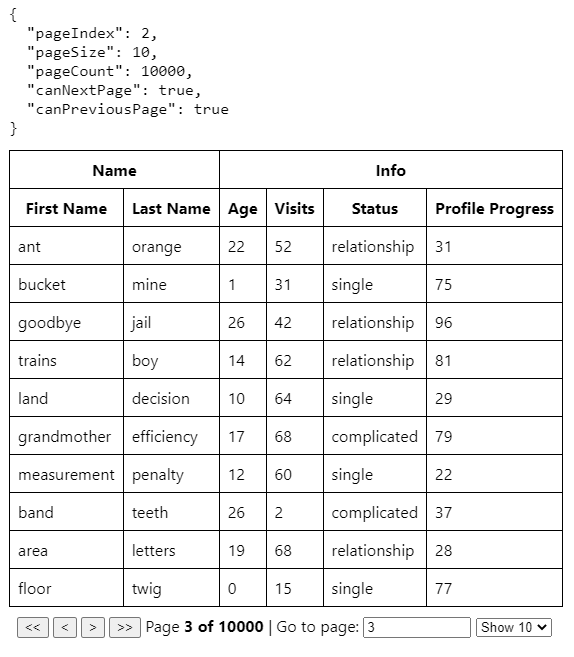
표 하단영역의 페이징에 관련된 기능을 렌더링 할 수 있으며 해당 DOM에 들어갈 이벤트가 바로 제공받은 인터페이스들이다.
<div className="pagination">
        <button onClick={() => gotoPage(0)} disabled={!canPreviousPage}>
          {'<<'}
        </button>{' '}
        <button onClick={() => previousPage()} disabled={!canPreviousPage}>
          {'<'}
        </button>{' '}
        <button onClick={() => nextPage()} disabled={!canNextPage}>
          {'>'}
        </button>{' '}
        <button onClick={() => gotoPage(pageCount - 1)} disabled={!canNextPage}>
          {'>>'}
        </button>{' '}
        <span>
          Page{' '}
          <strong>
            {pageIndex + 1} of {pageOptions.length}
          </strong>{' '}
        </span>
        <span>
          | Go to page:{' '}
          <input
            type="number"
            defaultValue={pageIndex + 1}
            onChange={e => {
              const page = e.target.value ? Number(e.target.value) - 1 : 0
              gotoPage(page)
            }}
            style={{ width: '100px' }}
          />
        </span>{' '}
        <select
          value={pageSize}
          onChange={e => {
            setPageSize(Number(e.target.value))
          }}
        >
          {[10, 20, 30, 40, 50].map(pageSize => (
            <option key={pageSize} value={pageSize}>
              Show {pageSize}
            </option>
          ))}
        </select>
      </div>
컬럼별 sorting
https://react-table.tanstack.com/docs/examples/sorting
Examples: Sorting
Subscribe to Bytes The best JavaScript newsletter! Delivered every Monday to over 76,000 devs.
react-table.tanstack.com
Sorting 기능 또한 훅이 제공된다.

useSortBy 훅을 사용해서 테이블을 렌더링할때 sort 기능이 들어갈 table header 영역을 렌더링하는 columns 정보에
getSortByToggleProps 를 정의하면 sorting indicator를 사용 할 수 있다.무슨말인지 모르겠다면 바로 코드로 들어가는게 답이다.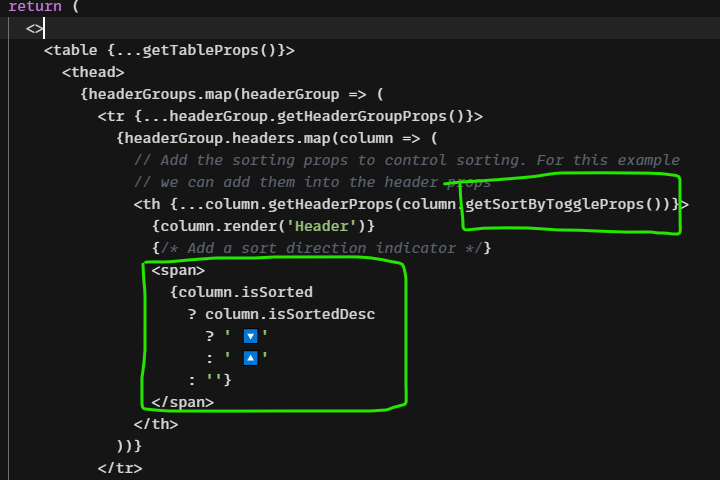
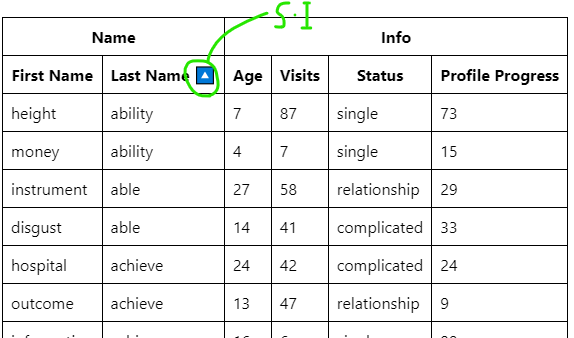
렌더링된 sorting indicator는 실제로 사용자의 인터랙션을 통해 해당 컬럼이 정렬되는 기능을 담고있다.
체크박스 기능
체크박스 기능은 useRowSelect 훅과 별도의 체크박스를 넣기 위한 컴포넌트를 삽입해야한다.
예제에서 제공하는 IndeterminateCheckbox 가 그 기능을 하는데,
const IndeterminateCheckbox = React.forwardRef(
  ({ indeterminate, ...rest }, ref) => {
    const defaultRef = React.useRef()
    const resolvedRef = ref || defaultRef

    React.useEffect(() => {
      resolvedRef.current.indeterminate = indeterminate
    }, [resolvedRef, indeterminate])

    return (
      <>
        <input type="checkbox" ref={resolvedRef} {...rest} />
      </>
    )
  }
)
ref 를 통해 실제 DOM에 참조하여 체크박스를 컨트롤하는 것을 볼 수 있다.이 ref props가 실제로 적용되는 코드는 아래와 같이 useRowSelect 이 적용된 인터페이스를 통해각 테이블의 셀을 렌더링 할때 제공되는 getToggleAllPageRowsSelectedProps 함수로 할당된다.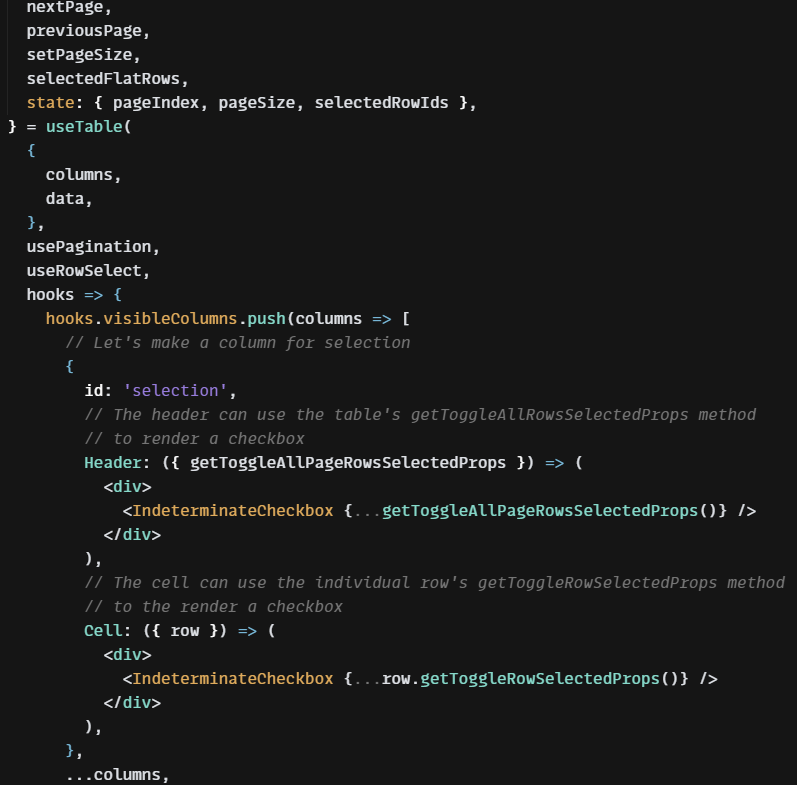
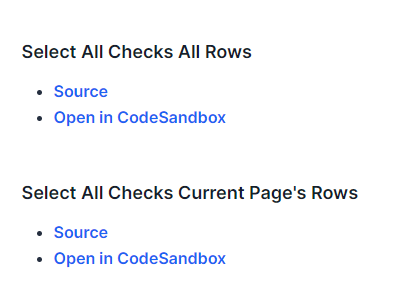
이 체크박스 기능은 테이블에 표시되지 않은 데이터 전체를 선택하는 기능과 페이지에 노출된 체크박스만 선택하는 두가지 버전으로 사용할수 있으니 참고하자.
검색 기능
검색기능은 우리가 일반적으로 API 요청을 통해 사용하는방식이 아닌 필터기능을 통해 미리 요청받은 데이터를 필터링하여 보여주는 방식을 사용한다.
레퍼런스의 테이블은 각 컬럼의 데이터를 필터링하고있지만 내 프로젝트의 경우 전체 테이블 데이터의 내용을 검색해야 하기때문에 useGlobalFilter 훅을 사용하였다.
https://react-table.tanstack.com/docs/api/useGlobalFilter#useglobalfilter
API Reference: useGlobalFilter
useGlobalFilter useGlobalFilter is the hook that implements global row filtering – in other words, filtering based upon data that may be in any column in a given row. This is often useful as a free-text search across all columns simultaneously. It can be
react-table.tanstack.com
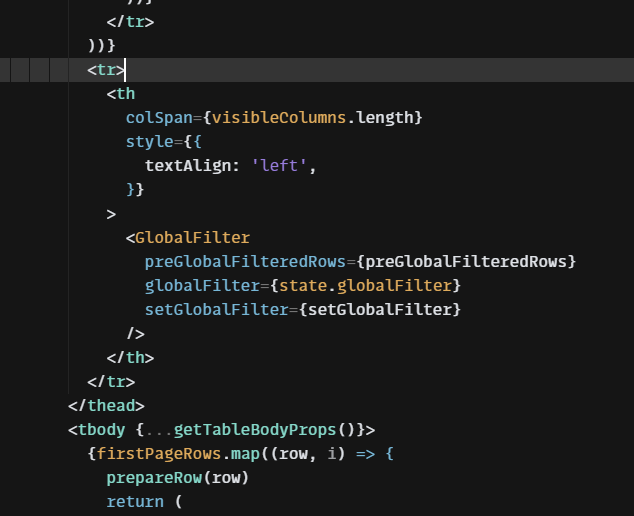
useGlobalFilter 훅의 경우도 별도의 컴포넌트가 필요하다.
function GlobalFilter({
  preGlobalFilteredRows,
  globalFilter,
  setGlobalFilter,
}) {
  const count = preGlobalFilteredRows.length
  const [value, setValue] = React.useState(globalFilter)
  const onChange = useAsyncDebounce(value => {
    setGlobalFilter(value || undefined)
  }, 200)

  return (
    <span>
      Search:{' '}
      <input
        value={value || ""}
        onChange={e => {
          setValue(e.target.value);
          onChange(e.target.value);
        }}
        placeholder={`${count} records...`}
        style={{
          fontSize: '1.1rem',
          border: '0',
        }}
      />
    </span>
  )
}
위 컴포넌트는 실제 검색어가 입력될 검색바 UI를 렌더링하는 컴포넌트이다.
자세히 살펴보면 useAsyncDebounce라는 훅이 사용되었는데, 대개 검색 UI를 개발할때 사용자의 입력 속도가 빠를경우 API가 여러번 호출되는 경우를 막기위해 마지막 호출만 이루어질수있도록 debouncing을 사용한것으로 보인다.

마찬가지로 useTable을 사용할때 매개변수로 useGlobalFilter를 할당하여 사용하는데 여기서 중요한것은
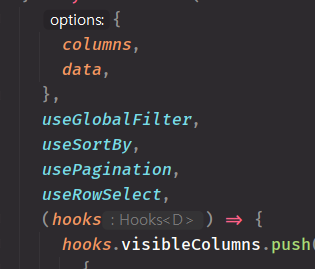
useSortBy, usePagination, useRowSelect 와 같은 훅보다 useGlobalFilter가 먼저 할당되어야한다.
할당 순서에 의존하고 있다는 점이 조금 아쉬운것같다.
마지막으로 실제 검색바로 사용할 GlobalFilter 컴포넌트를 렌더링하면 전체 데이터를 기준으로 필터링되어 빠른속도로 검색결과를 보여줄수 있다.
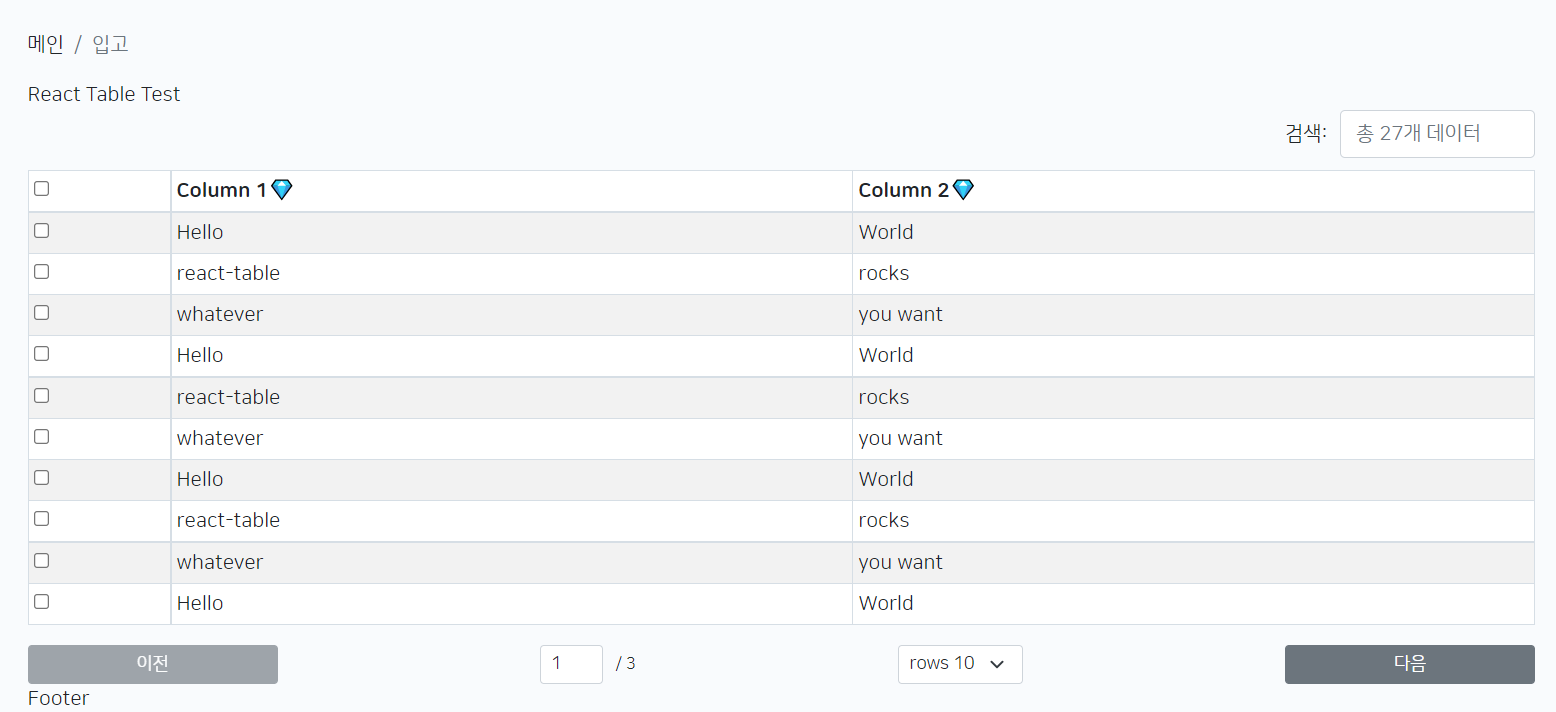
React Bootstrap을 사용하여 Table을 커스텀한 결과 현재 리액트 부트스트랩을 사용하여 커스텀하여 레퍼런스와 비슷한 모양으로 예시 테이블 컴포넌트를 작성해보았다.
실제 데이터를 사용해서 조금더 디테일한 설정이 들어간다면 훨씬 고급스러운 테이블이 될것같다.

'개발' 카테고리의 다른 글
TIL - Recoil Structure (0) 2022.05.22 TIL - React Table Library #2 (2) 2022.05.03 TIL - Next.js Google Analytics 코드 적용하기 (1) 2022.04.26 TIL - Mac 업로드 파일 한글 깨짐 (자모분리현상) (0) 2022.04.19 JS - Map (0) 2022.04.13